


Balls, Y'all
Balls, Y'all
Wherein I Finally Share How to Make My Grandmother Marie’s Signature Sequined Ornaments

My Grandmother Marie died when I was three months old. By all accounts, my dad’s mom was a magnificent woman: kind, generous, warm, gregarious, and creative. Not getting to know her is one of my life’s biggest regrets. I know I would have adored her.
When I was a kid, Grandmother’s memory was never more present than at Christmas, when my mom would pull out the elaborate sequined ornaments that Grandmother and her friends made. Dad said that every October, a card table used for crafting would appear in their living room and not come down until the new year. Originally, he said they made the ornaments for the St. Luke’s Episcopal Church holiday bazaar, moving on to make them for their families’ trees.
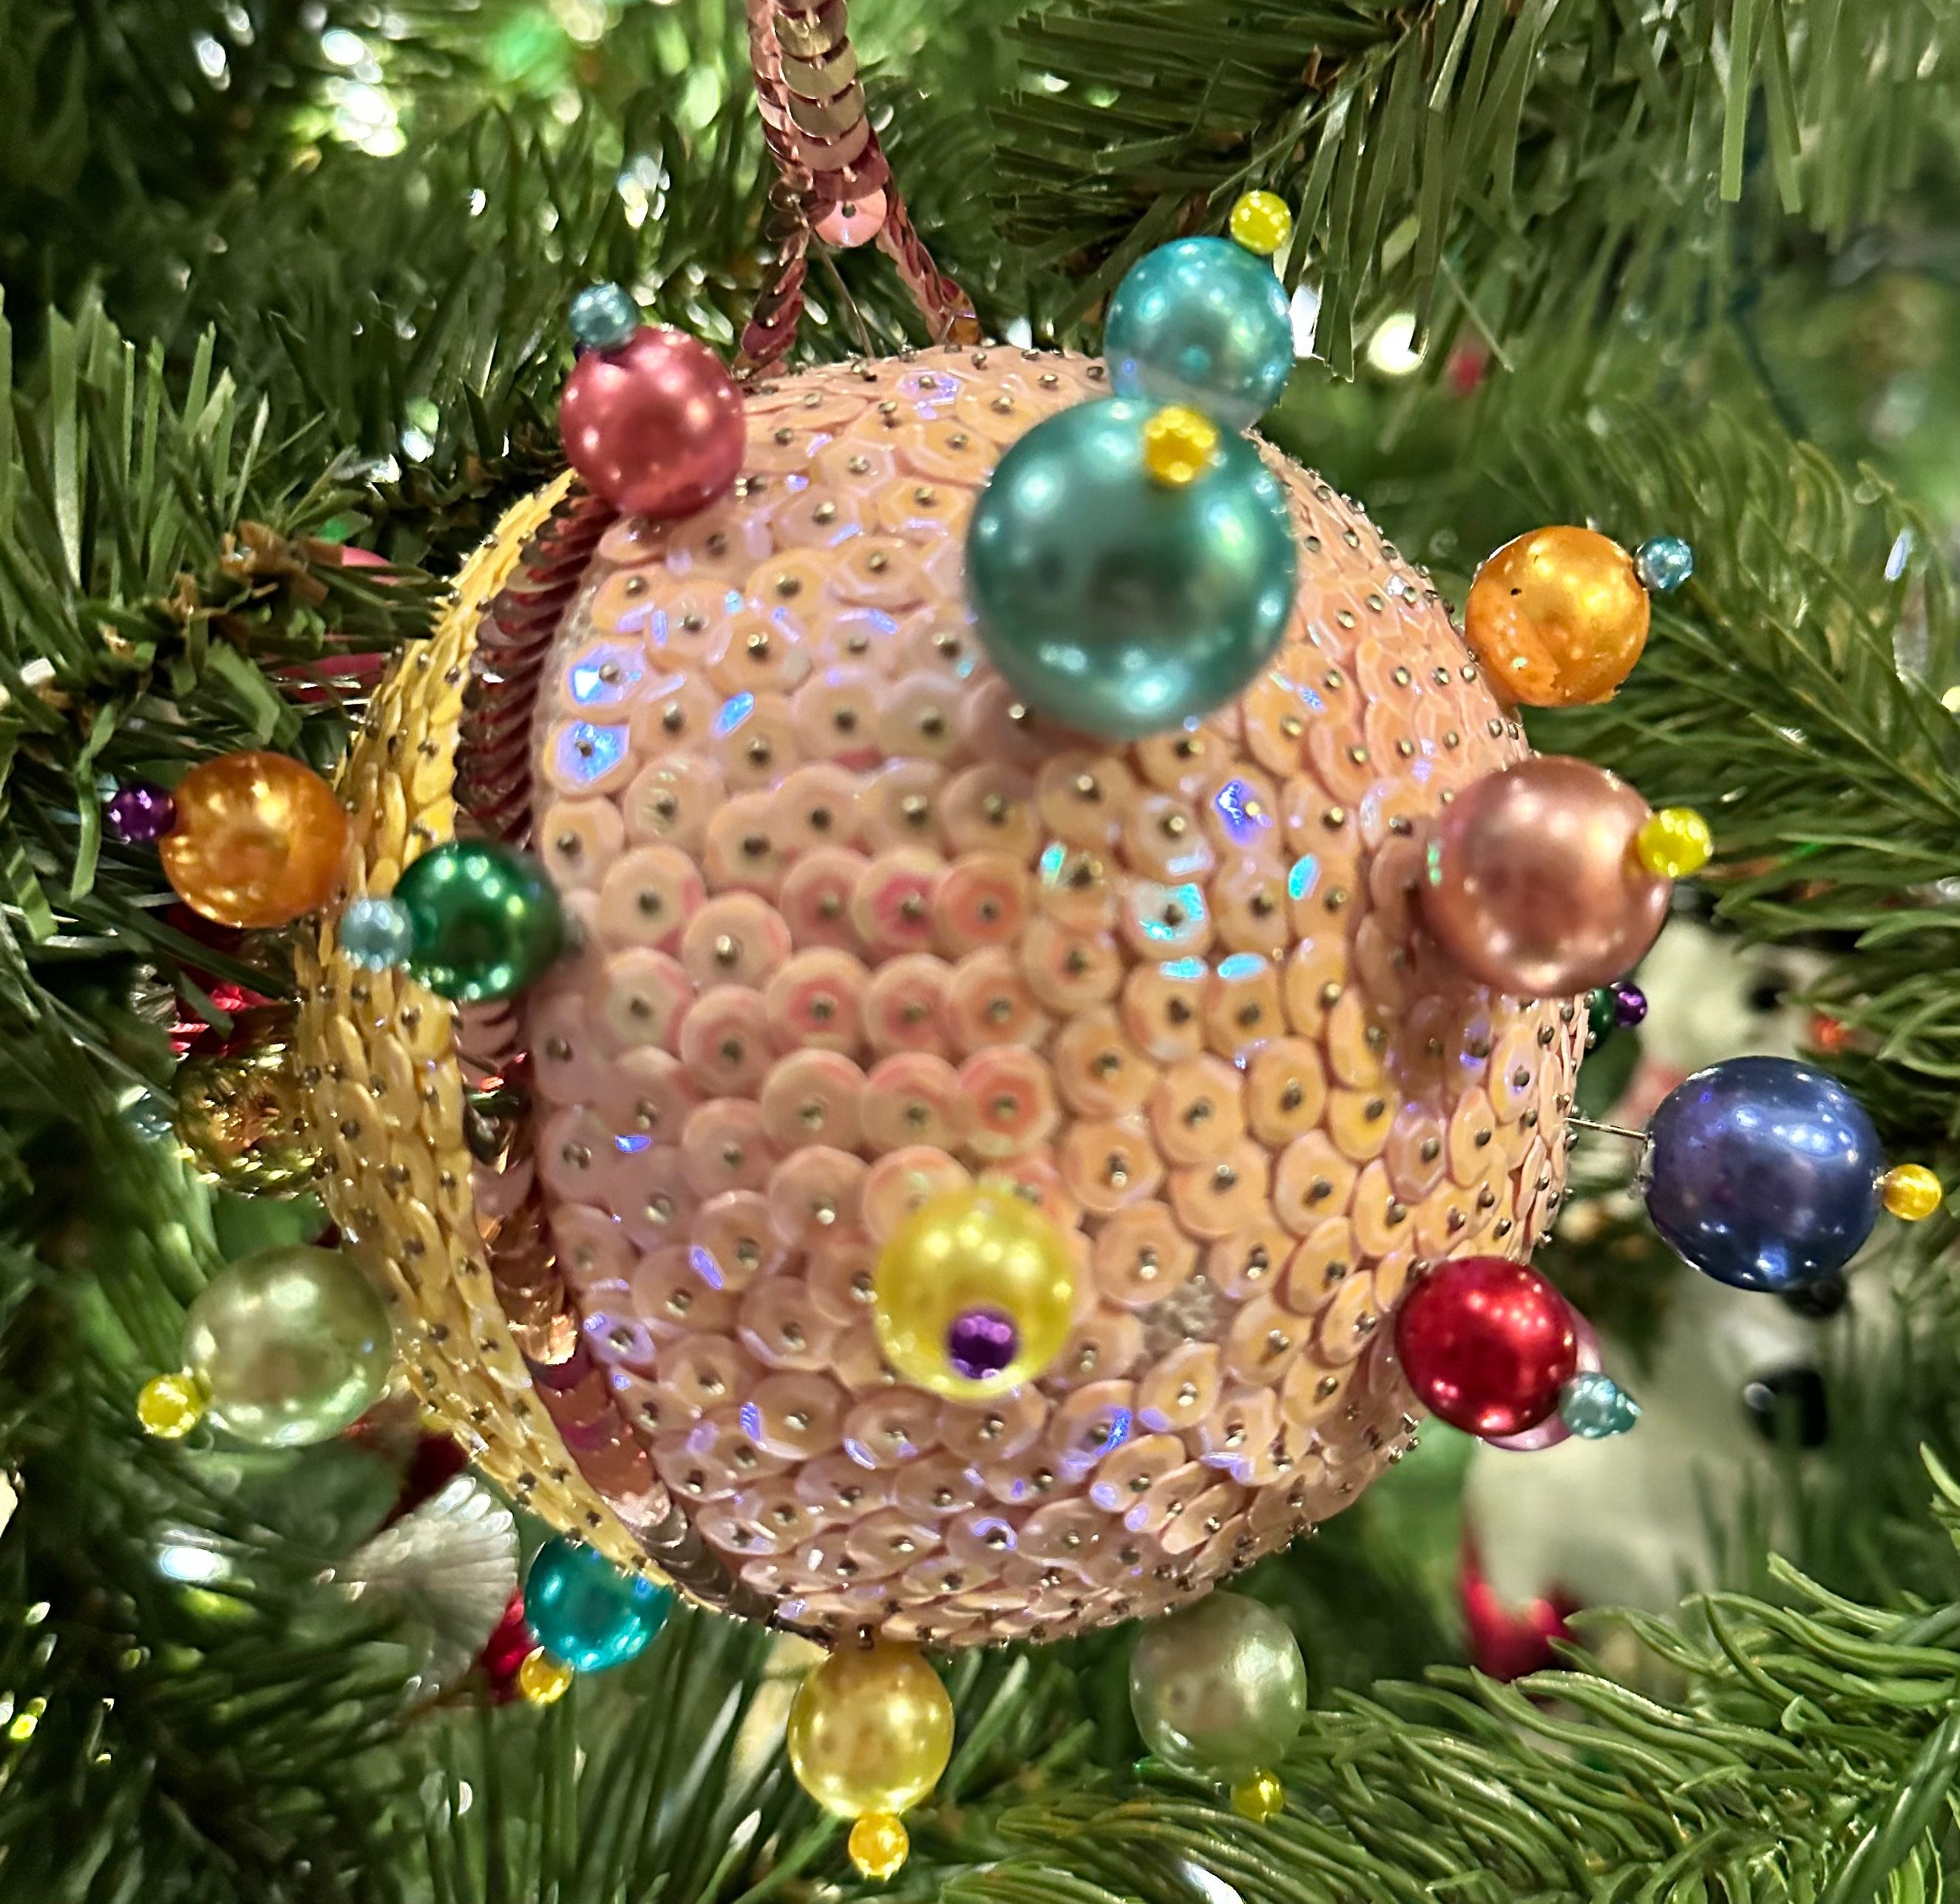
My parents have a few dozen of Grandmother’s finest specimens. They’ve always been my favorite ornaments on their tree. (Even now, when my mom has moved past putting up a big tree, she still brings the sequined ornaments out each year to hang by the mantle.) I appreciate these glamorous mashups of sequins, beads and ribbons as beautiful works of art, for sure. But over the years, they’ve become much more than that: they’re magical orbs that bring her memory to life.
Other than a few casual attempts when I was a kid, I didn’t get into the ball game until about seven years ago. That November, I went through a shitty breakup and found that the only thing that made me happy was making ornaments, Grandmother-style. I spent November and December sitting at my dining room tables, surrounded by stray pins and errant sequins, binging shows on Netflix and whipping out ornament after ornament.
Some holiday seasons are more productive than others, depending on my travel or work schedule. But I tend to average around 35 each year. Other than heartbreak, the thing that I’ve found makes me the most prolific is a global pandemic. For Christmas 2020, when I was both heartbroken and in Covid lockdown, I made over 50 balls. The callouses my forefingers took a month to fade.

Sequined balls are guaranteed crowd pleasers. When I share my creations on Instagram, the response is amazing. And s long as I’ve been posting them, I’ve been getting requests from friends and strangers alike asking me to share my process and links to my materials. In honor of the season, I’m laying out the goods.
Without further ado, please find a list of materials (both necessary and optional) and step-by-step instructions on how to make a basic sequined ball.
How long will this process take? I’m going to answer this like a parent on a family road trip: It takes as long as it takes. Some large ornaments have taken me six or more hours to finish; others I can whip out in an hour. Just depends on how fancy you want to get.
THE MUST-HAVES
Styrofoam balls | Get the “rough” ones, which are easier to work with than the smooth versions. Find them at any craft store (Michael’s, JoAnn, etc.). The size you buy should directly correspond to your level of ambition. I’m quick and it can still take me five hours to finish a 4.8-inch ball. The 2.8-inch size good to start with.
Straight pins | I used to seek out the short style that are advertised being designed for sequins. Then I realized that standard sized (often called dressmaking pins) are easier to handle and much more economical. I buy them in bulk, in packages of 4,000. Sounds like a lot of pins, but the bigger balls can take almost 1,000.
Sequins | This is the fun part. You can find these at craft stores, but the selection is going to be limited, especially this time of year. It’s easier to buy them online. Amazon (sorry) has a deep selection of colors, sizes and finishes. My go-to size is 7 mm, which covers a lot of area without looking blocky. I’ve had good luck with these and these.
ETC. | Elmer’s Glue, 18-gauge craft wire, wire cutters, an ice pick, a plastic tray and small storage containers to hold the sequins (Dollar Tree is great for these).

THE EXTRAS
Ribbon | Locally, I hit up Nashville’s Textile Fabrics to look for ideas within their insanely great selection of vintage and new stock. But most of the time I get plain velvet ribbon that I buy in variety packs on Amazon. I like 6- or 10-mm wide styles, but feel free to adjust the width to your design.
Rhinestones | I know I said that this information isn’t proprietary, but I do consider it a big deal that I’m sharing this little secret: I buy sheets of $1.99 rhinestone stud earrings at my local Hair World, one of my favorite places to buy fun accessories (not kidding), and use them as accents. These are incredibly easy to apply: just put a little glue on your chosen spot, stick in a stud, and voila! Instant dash.
Beads | I use deconstructed vintage necklaces. But you can find new ones in craft stores, etc. I use different sizes, depending on the ball.
Pins & Appliques | Most of the time, I build my designs or color schemes around one stand-out element. I find that vintage pieces are more dynamic in terms of style and colors (not to mention they’re better made), so I scour antique malls and thrift stores year-round for ideas.


THE PROCESS
The main thing to remember before you jump in is that there is no “rdight” or “wrong” way to make these things. Every ball is a unique, one-of-a-kind creation. Even if you and your friend start with the exact same materials, same size ball, and work on identical designs, your balls are gonna look different.
This is supposed to be fun, so don’t stress if your design doesn’t turn out the way you expected. Ninety percent of my balls look different than I imagined at the get-go — usually for the better. Just have fun and know that there are more balls where this one came from.
Above all, remember that no matter what you do, you will not fuck this up. The process is 100% un-fuckable. I promise.
(PS. I am not a fan of process photos, so you won’t find them here. Sorry for that in advance. If you want to find images that correspond to each step below, give the aforementioned Google search a go; there are plenty online.)
Without further ado, here are my very high-level how-to instructions for making sequined balls:
Select a ball and create the loop for hanging. Select a ball of whatever size you want. Make a hole through the middle of the naked ball with a thin skewer or ice pick. Thread a length of 18-gauge wire through the ball, leaving about a half-inch overhang; make a hook with that end of the wire and then, grasping the opposite end, pull the hook up so that it lodges in the ball. (Don’t worry about the exposed metal; you can cover it with sequins later.) Cut the opposite end’s overhang to about an inch; loop it back on itself, stick the end into the hole, and twist it to form a circle. You’ll thread the hanger through this eye. You can adjust the size of the eye by pushing more wire or less wire into the ball. (If my instructions aren’t clear to you, check out the ones I found on My Beautiful Mess.)

Come up with the design. Choosing a pattern is fun. Just let your mind roam. If you get stuck, take a clue from your materials (I like to have everything within grabbing distance). Color is always a big consideration for me. I like to play contrasting shades of sequins off one another. Other times, I’ll keep things simple and play with different shades of the same color. When it comes to designs, anything goes. Some that I love: colored stripes (vertical or horizontal); bisected colors, with one shade on top, another on the bottom; and color blocking (you can do this by partitioning areas of the ball off with ribbon, starting and ending at the eye).
Assemble your sequins. Even if I’m using several different colors of sequins, I like to work with one color at a time. The organizational method for my workspace includes a small puddle of sequins on the left; one of pins on the right; and Elmer’s glue inches away from my right hand.
Apply the glue. Cover a small work area on the ball with Elmer’s or another clear-drying glue. This isn’t absolutely necessary, but it ensures that you lose fewer sequins as the balls are affected by use and age. You want to work in small patches to keep the glue from drying out.

Time for sequins! This part is almost impossible to explain; you really have to do it for yourself to get the hang. But here goes: Take a sequin between the finger and thumb of your left hand; pick up a straight pin between the opposite thumb and forefinger. Poke the pin through the middle of the sequin. With the ball in your left hand, push the sequined pin into the ball with your right. From there, follow the pattern you created a few steps ago, making sure to cover the bottom of the ball where wire might be exposed.
Design tip:. You can lay the sequins dome-side up or dome-side down; neither is more wrong or right than the other. Dome down makes for a rougher looking surface. In terms of spacing, you can overlap the sequins or space them to where they don’t touch. Again, this is entirely up to you.
And that’s it!
Easy, right? Feel free to incorporate ribbons and pins and other decorative element into your design. You can apply them directly over the sequins or put them on beforehand; either way, use glue and pins to secure.
I want to know what you make! Post your creations on Instagram and tag me: @libbycallaway1970. I’ll make sure to repost them.
Happy holidays!
